Create a Repository
A repository contains all of your objects, including the revision history. It can be considered the lakeFS analog of a bucket in an object store. Since it has version control characteristics, it’s also analogous to a repository in Git.
Create the first user
When you first open the lakeFS UI, you will be asked to create an initial admin user.
Note: If you already have lakeFS credentials, log in and skip to creating the repository.
-
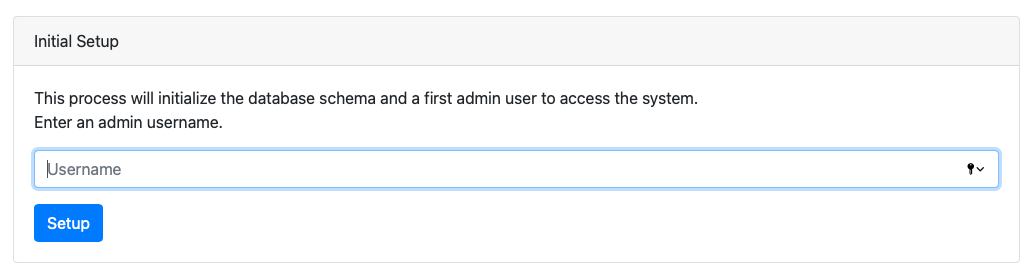
Open the lakeFS UI in your browser (how?) Use an address pointing at your lakeFS server. Depending on how you deployed lakeFS, this can be a custom address (e.g., https://lakefs.example.com), the address of a load balancer, or something else. and choose a name for your admin user.
-
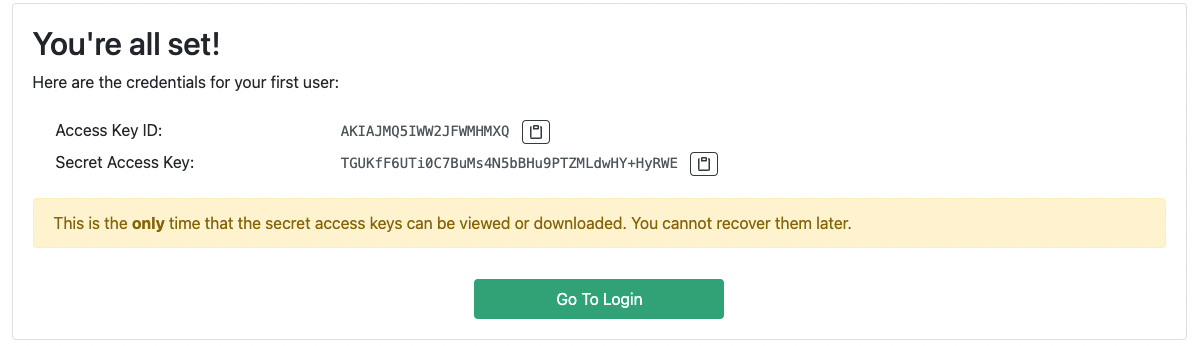
After clicking Setup, your lakeFS credentials will appear. Copy and store them somewhere safe, since you won’t be able to see them again.
-
Click the button to go to the login screen.
-
Use the credentials to login as an administrator.
Create the repository
-
When logged in to lakeFS, click Create Repository.
-
In the shown dropdown, choose Blank Repository (what are the other options?) The other options can help you integrate your existing tools with lakeFS.
-
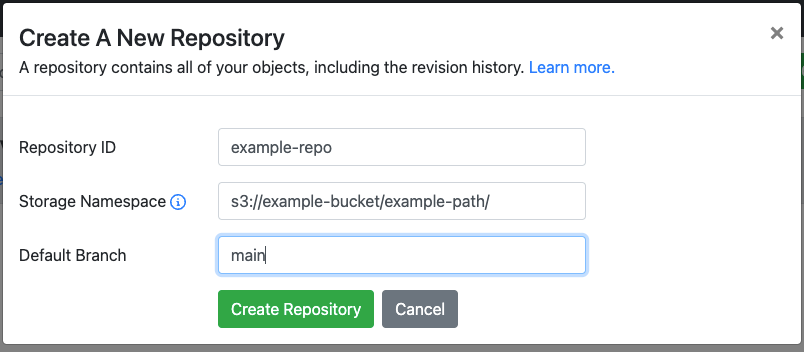
Fill in a repository name.
-
Set the Storage Namespace to a location in the bucket you’ve configured in a previous step. The storage namespace is a location in the underlying storage where data for this repository will be stored.
The storage namespace is a URI, and its scheme is determined by the storage type. For example, the storage namespace can be
s3://example-bucket/example-path/if you’re using AWS S3, orgs://example-bucket/example-pathif you’re using Google Cloud Storage. -
To finish creating the repository, click Create Repository.
Next steps
You’ve just created your first lakeFS repository!
- You may now want to import data into your repository.
- Check out how lakeFS easily integrates with your other tools.
- Join us on Slack to introduce yourself, discover best practices and share your own!